Hog Gun Holster part 2
- Charlotte Claridge
- Oct 23, 2017
- 2 min read

So if you follow me on Instagram you have probably seen the progress of the hog holster. Here I will try and go through the progress made from Hog Gun Holster part 1. As you can see above, the next stage was to make the gun handle. I did this the same way I made the holster, by marking out a grid around an image of Roadhog's holster and scaling it up. I Once I cut out 3 pieces of foam I glues the pieces together then slide the handle into place. I added the extra foam on the outside to make sure it was nice and flat.
As you can see from the reference pictures the holster has lots of small details which I needed to create. For this I traced out each shape separate and then cut these out of a thin crafting foam.
Where there is more raised detail I have simply glues layers of the foam together. Originally, I thought I would need to glue gun them all...which would have been expensive. I then wondered if I could use double sided tape. After all, everything was going to be covered in worbla anyway. It worked like a charm!


Once I had all of the pieces cut out it was time to see what it would look like all put together. You can see the rough draft on the left, then with more details added on the right. Some of these pieces were to be attached before I placed one large piece of worbla over, and others I wanted to cover individually and add on after.


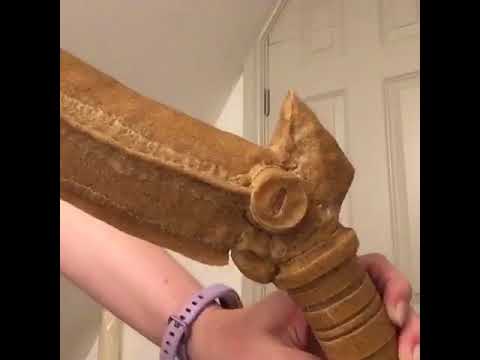
In the video to the left you can see how I started to cover the foam. The angle is slightly off, so I apologise as I'm starting to work out how best to document everything as I go. I cut a rough shape of worbla out and placed it over the foam shape. I then heated it up with a heat gun till it starts to go lighter in colour and is pliable. WARNING - this is hot! Please use a heat mat underneath and be careful. I am using wooden sculpting tools to help push the worbla into place. As the worbla cools it hardens, leaving whatever shape you like. It is also very sturdy, which is one of the many reasons I love it so much. Not only are my props sturdier in general, they're also less likely to fall apart if assembled correctly.
Once all these smaller details were done I was able to heat up the back and the spot where they were going to be placed, then simply stuck them to the main piece!
I know this is vaguer then my last posts, I got a little carried away and forgot to take progress photos. Below you can see the final prop ready for spraying!
Until next time! Cheers Love! xxxx


Comments