Roadhog Hook part 2
So what have I been up to? Let’s start with the hook. Once I was happy with the rough shape it was time to start covering it with the extremely magical worbla. I’m in love with this product. Yes, it’s expensive, but it’s worth it. The prop is stronger and I can sculpt in details. I feel like every time I use worbla I’m a bit more confident in my abilities. It’s a fascinating medium to work with and I highly recommend it if you are able to get your hands on some.

I tried to cut out the correct shapes for the hooks and do it neatly..yeah, that didn’t happen! I do feel more confident merging worbla together though when it overlaps. It’s not the easiest of things to do, and the molten hot plastic can burn your fingers if you get impatient like I do. Best tip is to let it rest and cool then go back to it. I heat it till it goes white which means it’s much easier to mold into shape – it takes the consistency of grainy playdoh? Or something similar.
Once the main hook was covered I placed the plastic pipe onto the bottom and used some hot glue to roughly put it in place before covering with worbla (1). That’s one of the amazing things about this product, it makes an awesome hard shell for your props meaning if you use different materials underneath it won’t show up. Plastic and foam look the same when covered.

I wanted to give the hook a sharper looking blade. To do this I heated up thin long strips of worbla together (2). The way I did this was to first heat the strip longways along a piece of foil so I got a 90* angle. I did the same with a second piece then heated them together so the shape was an upside down Y shape. I could now heat up the two open edges and run them along and around the edge of the hook blade giving it a ‘sharper’ appearance without it actually being sharp (3).

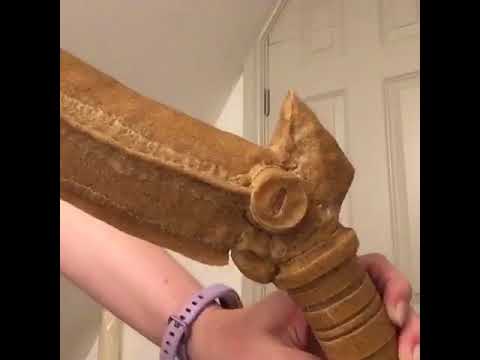
I then added some more details including the protruding screws that run through the blade near the top of the handle and the small strips around the handle of the hook.
I also added the loop at the bottom ready for the chain to hang from.
In preparation I bought some plastic-dip spray paint cans ready for when I want to prep the prop. With my tracer cosplay I missed this step and payed for it with chipping paint which was heartbreaking. This time I hope covering it in plasti-dip will be enough as a good base coat. My

dad is an awesome spray painter, so I will probably ask him to do this for, especially so it gets a good even coat.
Next steps before I do this is to smooth down all the hard edges that are still possible..or melt down seeing as it’s worbla. I then intend to add the three nails on the top and bottom of the blade. Once this is complete I think I’ll be ready for the base coat! I do have some plastic chain already made, though might make my own out of worbla so it’s nice and chunky. Not sure yet, I need to think it through more.

I think that’s the biggest lesson when making any prop. I may plan everything, but at the end of the day I go with my gut feeling or end up being spontaneous and trying something new.
Until next time!
Cheers love!
xoxo